
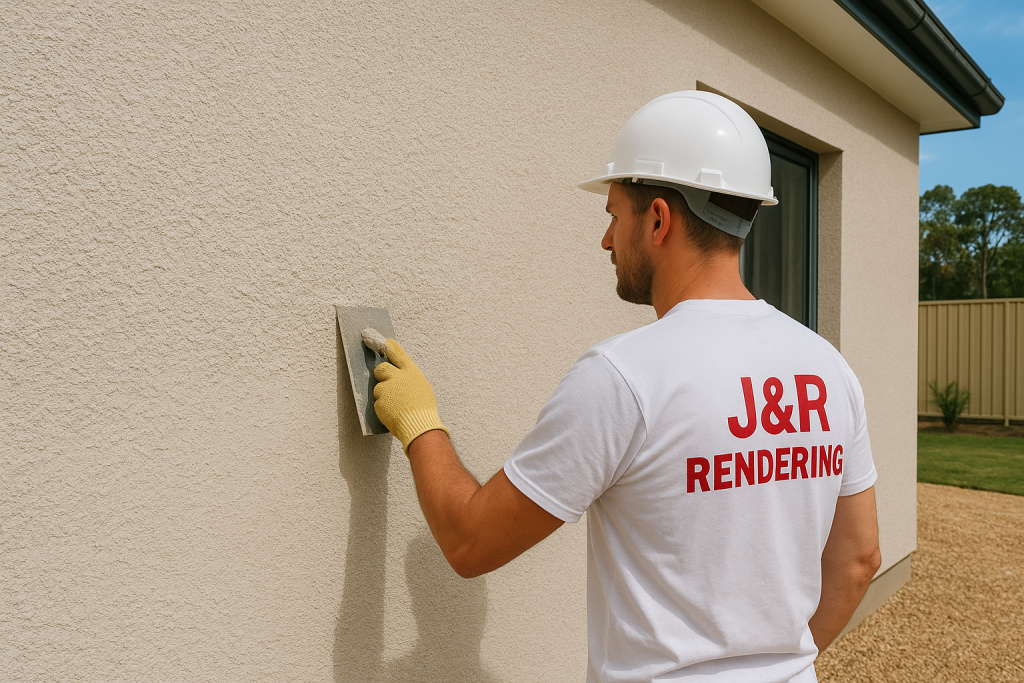
Let’s get one thing straight. A rendered wall is not one thick coat of mud slapped on by a bloke with a trowel and a dream. A good render job is a layer cake, and every layer has a different job. Skip one, rush one, or mix one wrong, and your wall will let you know. It usually does this with cracks, hollow patches or a finish that peels off after one wet summer.
At J & R Rendering, we get a lot of calls from homeowners who say, “My render looked great for a year, then it started cracking.” Nine times out of ten, the problem is in the layers. Sometimes there weren’t enough of them. Sometimes they were put on in the wrong order, or too fast.
So grab a cuppa. Here is how multiple render coats team up on an exterior wall, why each one matters, and what to look for when you’re comparing rendering contractors in Sydney.
Why Not Just Do One Big Coat and Knock Off Early?
Fair question. It’s tempting, and some cowboys will happily do it.
The problem is physics. Wet render shrinks as it dries. The thicker the layer, the more it shrinks, and the harder it pulls against the wall behind it. Pile it on in one go and you get slumping, shrinkage cracks and weak bonding, because the render is fighting itself the whole time.
Layering fixes this. Thin coats shrink less and cure more evenly. They also grip better, because each coat is built to bond with whatever sits beneath it. Technical render specs insist on good bonding between all coats, not just to the wall. The system is only as strong as the weakest join.
Think of plywood. Thin layers glued together beat one fat plank every time.
Layer One: The Scratch Coat (Your Wall’s Handshake)
The first coat is the scratch coat, sometimes called a dash or key coat. It isn’t pretty and it isn’t meant to be.
Its only job is to grab the wall. Brick, concrete block, Hebel, old bagged walls and fibre cement all have different suction levels. A thirsty brick will suck the water out of fresh render and leave it weak and crumbly. A dense concrete wall does the opposite, and the render just slides off.
The scratch coat sorts this out in three ways:
- It creates the bond. The mix is sticky, usually a bit richer in cement, and pressed hard onto the surface.
- It evens out the suction, so the next coat dries at a sensible rate.
- It gets scored with a scratching tool, giving the next layer a rough, grooved surface to lock into. That’s where the name comes from.
Render guides for the trade say it plainly: leave the first coat rough to provide a key. A smooth first coat is like trying to stick a poster to a mirror.
Before this coat goes on, the wall has to be properly prepped. That means cleaning off dust, loose paint, efflorescence and flaking old render. Cutting corners here means everything above it is built on sand, and not the good, well-graded kind.
Layer Two: The Base Coat (The Real Muscle)
Once the scratch coat has set firm, the base coat (also called the brown or floating coat) goes on. This layer does most of the heavy lifting.
The base coat:
- Builds thickness and gives the wall its structure and weather resistance
- Straightens things out. Old Sydney walls are rarely true, and the base coat is where a good renderer makes them look like they are
- Sets the shape: corners, window reveals, flat planes and clean lines
It’s applied with a trowel or a render pump, then screeded off with a straight edge until the surface is flat. Then it’s left to cure. Here’s the bit most people don’t know:
Each coat should be weaker than the one before it.
That sounds backwards, but it’s a core rule of multi-coat work. If a top coat is stronger and more rigid than the coat under it, it shrinks harder and pulls the wall apart. A graded system, with strong at the back and slightly weaker toward the front, lets stresses ease out instead of building up. Tradies argue about exact mix ratios over smoko, but the principle holds.
Our cement rendering services in Sydney follow this logic on every wall, from a small garden feature to a full double-storey.
The Waiting Game: Curing Between Coats
This is where good renderers earn their money, and where rushed jobs fall over.
After each coat, the wall needs time. Industry guides commonly talk about a few days up to a week between coats, depending on thickness, weather and substrate. Rushing the next coat traps moisture, and trapped moisture means hollow spots, cracking and lime bloom, those ugly white patches that show up weeks later.
Two things matter during this wait:
- Damping down. The previous coat should be dampened before the next goes on. Dry, thirsty render steals water from the fresh layer above it and weakens the bond. Too wet, and the new coat slides about. It takes judgment, and you can’t learn it from YouTube.
- Curing, not just drying. Fresh cement render needs controlled, slow curing. In a Sydney heatwave or a westerly, that can mean misting the wall and shading it. Dry it too fast and it cracks. Rush it and the weather wins.
If a contractor says they can do “three coats in two days”, ask some questions. Politely, then firmly.
Layer Three: The Finish Coat (Where the Magic Shows)
Now we get to the part you can see. The finish coat is the thin top layer, and it decides how your house looks from the street. It gets screeded, floated, sponged, trowelled or textured, depending on the style you want.
Popular options include:
- Smooth steel-trowelled for a sleek, modern look
- Sponge or float finish for a soft, slightly grainy surface
- Stipple, roughcast or Tyrolean for a classic flicked texture
- Bagged and painted for that older, Mediterranean look
Here’s a trap for DIYers. A decorative finish needs a flat, even surface under it. Tradies on forums say the same thing: you can’t put a Tyrolean finish straight over a scratch coat and expect it to look right, because there’s no flat base for it to sit on. The base coat is what makes the finish look good.
If you’re chasing a specific look, our team handles textured wall rendering across Sydney in a wide range of styles, from subtle to full-on statement walls.
Same Principle, Different Systems: Cement, Acrylic and Granosite
Not all rendering works the same way, and the “layers” change depending on what’s going on your wall.
Cement render
The traditional three-stage build we’ve described: scratch, base, finish. It’s strong, breathable, great over brick and block, and the classic choice for Sydney homes. It cures slowly and rewards patience.
Acrylic render
Acrylic systems use polymer-modified materials and are applied in thinner sections. They’re more flexible, which is handy on lightweight substrates like Hebel and foam, where walls move slightly and rigid cement can crack. The layering is the same idea (prep, base, finish), just with different materials and quicker turnaround. Our acrylic renderers in Sydney use this approach on jobs where flexibility and fast project times matter.
Quicker doesn’t mean skip the steps, though. Every manufacturer publishes recoat windows, and following them is not optional.
Granosite systems
Granosite is a coating system from Wattyl, and it’s the clearest example of layering by design. A typical system runs something like this:
- Primer to seal the surface and even out absorption
- Base coat or render to build and level the surface
- Texture or finish coat, applied by roller, brush, lambswool mitt or trowel depending on the style
Some Granosite finishes can be done in one or two coats, and the product sheets say two coats are needed for a proper matt finish. There are strict timing windows too. Certain primers have to be coated within a set number of days, and the final coat shouldn’t be washed for a full week after application. Miss those windows and you’re gambling with adhesion.
Some topcoats are also designed to act as a membrane. They push external moisture away but let vapour from inside the wall escape, so the wall can breathe. That’s the layer cake at work: each layer has a job, and the jobs are complementary.
If you like the idea of a sandy, bagged or stone-like finish, have a look at our Granosite render finish in Sydney page. We also list the products we use, so you know exactly what’s going on your walls.
Sydney Conditions Make Layers Matter Even More
Sydney isn’t the easiest place to be a wall. Harsh UV, humid summers, sudden storms, salt air near the coast, and clay soils that move with every wet-dry cycle all put stress on a render system.
Here’s how layering helps:
- Cracking: Multiple thin coats distribute shrinkage and movement better than one thick slab
- Moisture: Proper base coats and sealed finish coats help keep water out of the substrate
- Salt and weather: A well-built finish coat shields the layers underneath
- Heat: Staged application lets each coat cure at a controlled rate, which matters on a 38-degree day
Layers also have to cope with where the wall meets the ground. Render should never touch soil or bridge a damp-proof course, or you’re inviting moisture to climb the wall. A decent renderer plans this at the start.
When the Layers Fail: Signs You Need Render Repair
Even good render doesn’t last forever. Here’s what failing layers look like:
- Hollow or drummy sound when you tap the wall (the bond has let go)
- Map-like or spiderweb cracks (shrinkage or movement)
- Bubbling or flaking paint and finish
- Damp patches or stains, especially low on the wall
- Chunks falling off. That’s about as clear as a signal gets.
Don’t just fill and paint. If the problem is deep in the system, a cosmetic patch is like putting a bandaid on a burst pipe. A proper fix means finding out which layer failed and why, then rebuilding from there. It’s what we do with render repair in Sydney, and it often means cutting back to sound material, re-keying the surface and rebuilding in stages.
Granosite has even developed thin-section patching materials for rectifying defects, applied in multiple coats for severe damage. The industry knows a quick patch is a short-term fix.
How to Spot a Good Rendering Contractor (Without a Trade Qualification)
You don’t need to be a plasterer to ask smart questions. When you’re shortlisting rendering contractors in Sydney, ask:
- How many coats will you apply, and why? A good answer references your substrate. A vague answer is a red flag.
- How long do you leave between coats? “It depends on the weather” is a good start. “Same day” isn’t.
- What products do you use? They should name them easily.
- How do you prep the wall? Cleaning, repairs and priming should be part of the answer.
- Can I see finished jobs? Real photos of real walls, please.
Check licences and insurance, and get a written quote that spells out the system, not just the price per square metre. Cheap quotes tend to hide skipped layers.
FAQs: The Slightly Nerdier Questions
- Can you apply new render over old painted render?
Sometimes. It depends on whether the old render is sound and well bonded. A tap test and a pull test tell us a lot. If the old coat is hollow or flaking, it has to come off or be repaired first, because a new coat is only as good as what it’s stuck to. Some thin renovation-type render products are made for pre-painted surfaces, but they only suit certain substrates. - Why did my render crack even though it was “three coats”?
Coat count isn’t everything. Cracks can come from mixes that are too strong, coats applied too thick, poor curing, no control joints, or wall movement. A properly built system accounts for all of these. Number of coats is just one part of the story. - Is acrylic render better than cement render?
Neither is better in every case. Cement is hard to beat on brick and block and has a traditional, solid feel. Acrylic offers flexibility and faster completion, which suits lightweight substrates and tighter timelines. The right answer depends on your wall, budget and the look you want. - How long before I can paint over a fresh render?
Cement render needs to cure properly first, and it varies with weather and thickness. Acrylic and Granosite systems have their own timeframes, and the manufacturer’s data sheets are the final word. Paint it too early and you can trap moisture or get patchy results. - Do I need control joints in render?
Often, yes. Large walls move, and expansion joints are placed along structural movement lines so the render cracks where you want it to, not in the middle of your feature wall. - Can textured render hide a bumpy wall?
It can disguise minor imperfections, but it can’t fix a seriously uneven wall. The base coat does the levelling. A heavy texture over a poor base only emphasises problems.
Final Word: Layers Don’t Lie
A rendered wall that stays looking sharp for decades isn’t lucky. It’s built well. Each coat prepares the next, each one cures properly, and the whole system works together to keep weather out and style in.
So when you’re comparing quotes, don’t just ask “how much?” Ask “how many layers, and how are you doing them?” The answer tells you everything about the contractor.
If you’ve got a wall that needs rendering, re-rendering or rescuing, get in touch with the J & R Rendering team and we’ll talk it through honestly, no jargon and no dodgy shortcuts. And if you’re still hungry for render knowledge, there’s plenty more on our blog.
Because a wall is only as good as the layers behind it.