
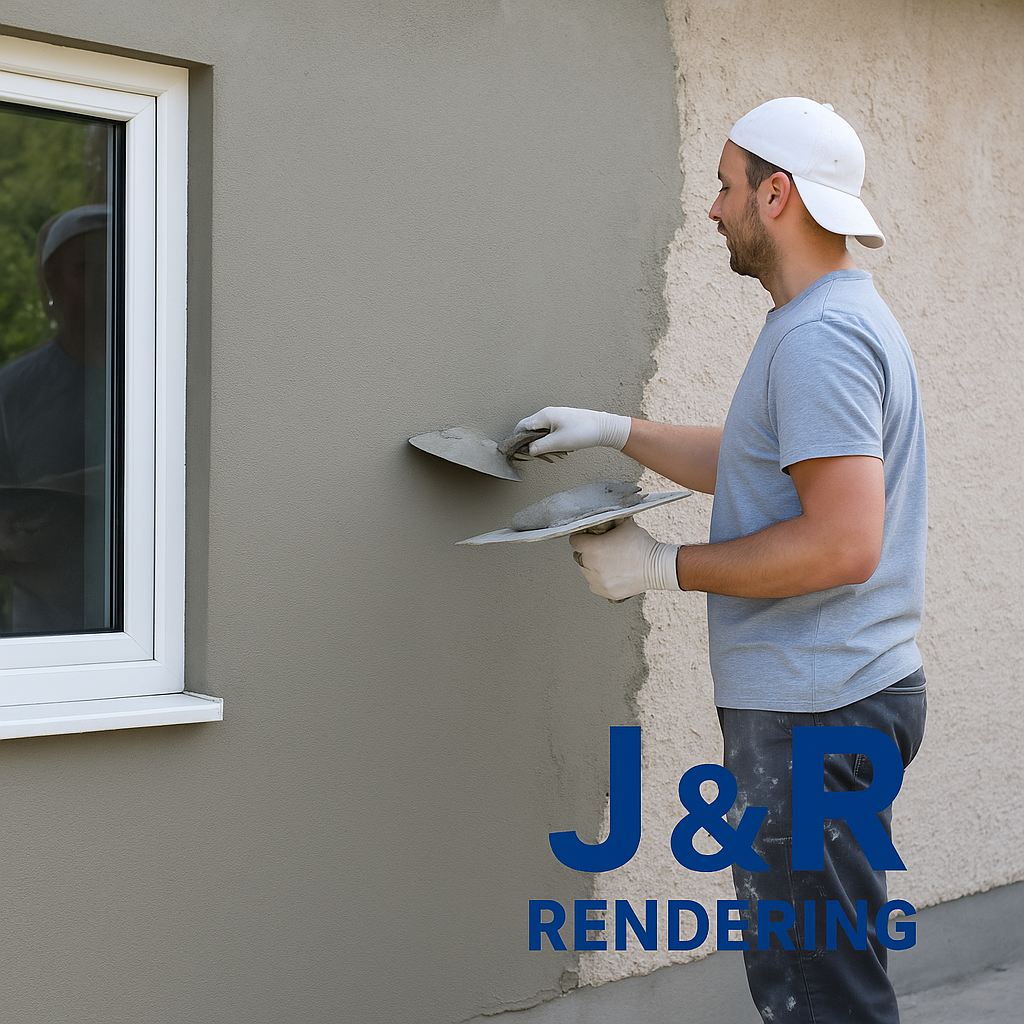
Let’s be honest — nobody grows up dreaming about cement render. It’s not exactly dinner party conversation, unless you live in a share house full of tradies. But the second you stand across the street and look at your own place next to the neighbour’s freshly rendered façade, you suddenly care a lot. Because in Sydney, where humidity, harbour salt, and a summer sun that means business all gang up on your exterior walls, render isn’t decoration. It’s armour.
This guide is for anyone who’s typed “rendering services Sydney” into Google at 11pm while side-eyeing a crack that definitely wasn’t there last month. We’re going to walk through what render actually does, the different types on offer, why Sydney’s climate is such a diva about it, and how to pick someone who won’t leave you with a lumpy wall and a bigger headache than when you started. The team at J & R Rendering has spent years crawling over scaffolding across this city, so consider this the no-fluff version of what they’d tell you over a cuppa.
Why Sydney Homes Take Rendering So Seriously
Sydney isn’t Melbourne. We don’t get four seasons in one day, but we do get a coastal climate that swings from sticky, salt-laden humidity in the east to baking, UV-heavy heat out west, with the odd east coast low chucking sideways rain at everything in between. Add in older housing stock — plenty of federation-era brick and post-war fibro — and you’ve got the perfect storm for walls that need real protection, not just a fresh coat of paint slapped over cracks.
Rendering solves a few problems at once. It smooths out uneven or ageing brickwork, adds a genuine weatherproofing layer, and lets you completely change the look of a property without the expense of a full rebuild. It’s also one of the few reno jobs that pays for itself at resale — a tired brick veneer with hairline cracks everywhere doesn’t exactly scream “well-maintained home” to a buyer.
The Main Types of Render (And When Each One Actually Makes Sense)
This is where a lot of homeowners get stuck, because every rendering company seems to push a different “best” option. The truth is there’s no universal winner — it depends on your substrate, your budget, and how much movement your walls are dealing with.
Cement Rendering
The old faithful. A mix of cement, sand, and lime applied directly onto brick or blockwork, cement render has been used across Australia for generations because it’s tough, affordable, and genuinely bulletproof against the elements once it’s cured properly. It suits solid masonry walls best — brick, block, or concrete — because those substrates don’t move much, and cement render doesn’t love flexing.
If you’re after that classic, smooth Sydney streetscape look, or you’re rendering a heritage-style home, cement rendering is usually the sensible starting point. It’s cost-effective per square metre and, done well, will outlast most other finishes.
Acrylic Rendering
If cement render is the reliable ute, acrylic render is the newer hybrid — more flexible, faster to apply, and better suited to lightweight substrates like Hebel, blueboard, and fibre cement sheeting that expand and contract more than brick. Acrylic render systems resist cracking far better on these movement-prone surfaces because, unlike a rigid cement mix, they can flex slightly without splitting.
It also comes pre-coloured in most cases, which means no separate paint job, less maintenance down the track, and a broader palette of finishes to play with. For newer builds, extensions, or anything built on lightweight panel systems, acrylic rendering is generally the safer long-term bet.
Textured Wall Rendering
Not every home wants that dead-flat, painted-concrete look. Textured rendering adds depth, grain, and visual interest — think of the difference between a plain white wall and one with subtle stipple or sponge texture catching the afternoon light. It’s popular on feature walls, entryways, and full façades where owners want something with a bit more personality than a flat finish.
Beyond looks, texture coatings genuinely help hide minor surface imperfections in older brickwork, which is handy if your walls have seen a few decades of Sydney weather already. If you’re chasing that “expensive architect-designed” look without an architect-designed budget, texture rendering does a lot of heavy lifting.
Granosite Render Finish
Granosite gets its own category because, frankly, it’s a different beast. It’s a polymer-based texture coating that’s been knocking around Australian building sites since the 1950s, and it’s stuck around because it works. Granosite can be trowelled, rolled, or sprayed to create anything from a fine sandstone-style finish to a bolder, coarser texture, and it’s particularly good at bridging old and new sections of a building — handy if you’ve extended and don’t want an obvious seam between the original house and the add-on.
It also happens to be excellent at disguising minor cracking in the substrate underneath, and its weather resistance against salt-laden coastal air makes it a genuine contender for anything east of the M1. Curious whether it suits your place? The granosite render finish page runs through the substrates and finishes on offer.
Cracks Happen — Here’s Why (And What To Actually Do)
Nearly every rendered home in Sydney will crack eventually. That’s not a scare tactic, it’s physics. Render is a hard, thin skin sitting on top of a wall that’s constantly moving in tiny, invisible ways — expanding in the heat, contracting overnight, settling slightly as the ground beneath the footings shifts with moisture levels. Add in Sydney-specific stressors like sudden temperature swings, salty coastal moisture creeping into micro-gaps, and the classic culprit — leaking gutters or poor drainage dumping water straight down an exterior wall — and cracking becomes less a question of “if” and more “when.”
The type of crack tells its own story. Fine hairline cracks are usually cosmetic, caused by shrinkage as the render cured or minor thermal movement — annoying, but rarely urgent. Diagonal or stepped cracks, especially ones that trace along mortar joints, often point to slight structural movement and are worth a proper look. Horizontal cracks are the ones to take seriously; they can flag foundation or structural issues that go well beyond a render problem.
Here’s the bit most DIY crack-fillers miss: slapping some filler over a crack without figuring out why it appeared just buys you a few months before it reopens. If there’s hidden moisture behind the render, or the wall is still moving, that fresh caulk is fighting a losing battle. A proper cement render crack repair job starts with working out the cause — moisture ingress, substrate movement, incompatible old patch materials — before anything gets reapplied, so the fix actually holds.
What Actually Happens During a Rendering Job
If you’ve never had rendering done before, the process can feel like a bit of a mystery. In broad strokes, it goes something like this:
- Inspection and prep — the crew checks the substrate, flags any existing damage, cracks, or moisture issues, and works out which render system actually suits your walls (this is the step a lot of cheaper operators skip, and it’s the one that matters most).
- Surface preparation — loose material, old flaking paint, and debris get removed. Cracks and damaged sections are addressed before anything new goes on, because rendering over a problem never makes it disappear.
- Base coat application — the first render layer goes on to build a solid, even surface and correct any unevenness in the wall.
- Reinforcement where needed — mesh or jointing is used at movement-prone points like panel joins or corners to reduce future cracking.
- Top coat and finish — the final coat delivers the look you’re after, whether that’s a smooth cement finish, a coloured acrylic system, a textured coat, or a granosite finish.
- Curing and quality check — render needs time to cure properly (rushing this step is a classic cause of premature cracking), followed by a final walk-around to check finish, colour consistency, and coverage.
Programme length depends on the size of the job, the substrate condition, access, and the finish chosen — a single wall might wrap up in a couple of days, while a full façade with texture or granosite work will naturally take longer.
Picking a Rendering Company in Sydney Without Getting Burned
Sydney’s rendering scene is crowded, and unfortunately not every outfit with a ute and a trowel is going to do right by your walls. A few things worth checking before you sign anything:
- Licensing and insurance — non-negotiable. If something goes wrong and the business isn’t covered, you’re the one left holding the bill.
- Product knowledge, not just application skill — a good renderer should be able to explain why they’re recommending cement over acrylic for your specific wall, not just quote a price and get started.
- Local experience — Sydney’s climate zones vary wildly between the coast, the inner west, and the western suburbs. A renderer who’s worked across all of them will spot issues a newcomer might miss.
- Willingness to show past work — photos of finished jobs, ideally on similar substrates to yours, tell you more than any sales pitch.
- Clear scope in writing — vague quotes are how “cheap” jobs end up costing more once the “extras” start appearing.
J & R Rendering’s crews work across cement, acrylic, texture, and granosite systems, and lean on the products they use to match the right system to your substrate rather than pushing whatever’s easiest for them. If you’re weighing up options, it’s worth having an actual look at what’s under the hood of a render system before committing to a finish.
A Quick Word on Maintenance
Rendered walls aren’t “set and forget,” but they’re low maintenance if you stay on top of a few basics. A gentle wash once or twice a year (a soft brush and mild detergent, never a high-pressure hose pointed straight at the surface) keeps mould and grime from building up in Sydney’s humidity. Keep an eye on gutters and downpipes — a surprising number of “render problems” are actually drainage problems in disguise. And if you do spot a hairline crack, get it looked at early. A five-minute inspection now beats a full repair job in twelve months.
FAQs
How long does cement render last in Sydney conditions? Well-applied cement render typically holds up for 15–20 years or more before it needs significant attention, though minor cracking can appear earlier depending on substrate movement and weather exposure. Coastal properties tend to see more wear due to salt air.
Is acrylic rendering better than cement rendering? Neither is universally “better” — they suit different situations. Acrylic flexes more, making it the better choice for lightweight substrates like Hebel or fibre cement that move. Cement render is more cost-effective and extremely durable on solid brick or masonry that doesn’t flex much.
Can granosite be applied over existing cement render? Yes, in most cases, provided the existing render is sound, properly prepared, and compatible with the coating system being used. It’s a popular option for refreshing an older render job without a full strip-back.
Why does my render keep cracking in the same spot? Repeat cracking usually means the underlying cause was never fixed the first time — ongoing wall movement, trapped moisture, or a repair material that wasn’t compatible with the original render. A proper diagnosis before repair is the only real fix.
How much does rendering cost in Sydney? Costs vary depending on wall size, substrate condition, access, and the finish chosen, so it’s genuinely worth getting a proper quote rather than relying on a per-square-metre rule of thumb you saw somewhere online.
Do I need council approval to render my house in Sydney? Generally, rendering an existing home doesn’t require council approval since it’s a cosmetic and protective finish rather than a structural change, but heritage-listed properties or strata buildings may have specific requirements worth checking first.
What’s the difference between rendering and plastering? Rendering is applied to exterior walls for weatherproofing and finish, typically cement, acrylic, or texture-based. Plastering is generally an interior wall finish. They use related materials but serve different purposes.
At the end of the day, rendering is one of those jobs where the difference between “looks fine for a year” and “looks brilliant for two decades” comes down entirely to who’s holding the trowel. If you’ve read this far, you’re clearly not the type to just grab the cheapest quote and hope for the best — which, frankly, your walls will thank you for. Have a browse through the J & R Rendering blog for more deep-dives into specific finishes and repairs, or if you’re ready to stop Googling and start fixing, get in touch via the contact page for a proper chat about what your place actually needs.